Create a Dataport
Dataports are used when you want to export or import a lot of information from a specific table rather than doing it manually. As a result we can process thousands of lines of information extremely quickly - which can be very useful when wanting to create spreadsheets/import journal lines/create reports.
Today I will explain how to create a simple dataport that will both - export and import Items from the 'Item' table.
Note: Dataports can be dangerous, if you accidentally import a file with incorrect values this could overwrite all your good data! Ensure you make backups of your database before trying any of this. Ensure this is done on your Test Database first - Never Straight to Live!!!!!!
1. Open the Database & Company where we will be exporting/importing data. In my case I am using the default 'Cronus' database provided with the install of NAV.
2. Ensure you are logged in as a 'Super' user.
3. Tools >> Object Designer >> Dataport >> New

4. Drill down on the 'DataItem' column and choose the relevant Table for the Dataport. In this case 'Item'.

5. Keep the Dataport Designer Open >> View >> Dataport Fields

6. Drill down and find the relevant fields we want to export / and eventually import.
Note: Dataports do not have to be both ways, it can just be for exporting or just for importing.

7. Once you have picked the fields press Ctrl-S to save the dataport (alternatively File >> Save).
8. You will be prompted to give the Dataport an ID - normally you will have a set range of allowed dataports in your license. This will typically be in the 50000 range. I suggest you try 50001 as your first. Also you must name your Dataport.

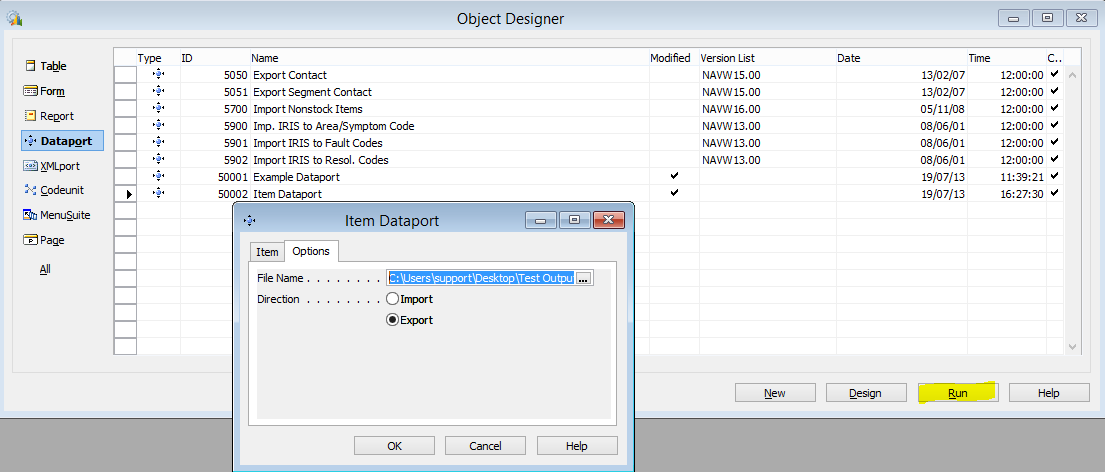
9. Once you have saved your dataport you can then run it using the Run function in the Object Designer.
10. Firstly I will be exporting all the data from the Item Table - just so we can have a look. Note how I have selected 'Export' and chosen a path to store the .txt file.
11. The outputted file will look something like the below.

This can also be opened in Excel - either rename the output .txt file to .csv or alternatively just select 'comma' separated when opening the file in Excel.

12. Now it is time to import some data. I have created a new workbook in Excel and ensured my columns match the order in which the dataport fields are laid out (see point 6).

13. Save the Dataport as a CSV (save as >> select the CSV format).
14. Select the 'Import' button on the Dataport >> Select the Import file we just created.

15. Press OK! If all goes well your new items will be sitting in the Item List.

Now you know how to make basic dataports. I will cover this in more detail in a later post ie. Importing Journals & Validation.
Finally - I must stress that this isn't something to do unless you are 100% comfortable that any loss of data is recoverable and ALWAYS do this on your Test Database first!
Finally - I must stress that this isn't something to do unless you are 100% comfortable that any loss of data is recoverable and ALWAYS do this on your Test Database first!
Andy
No comments:
Post a Comment